If you like shooting and collecting pictures, you might be interested in geotagging your pictures. More and more software can use such geospatial metadata information for categorizing and visualizing these pictures, for example in an interactive map. Today, on I love Free Software day, I show you a way how to batch geotag your pictures with OpenStreetMap and Free Software only.
Geospatial metadata, together with time-stamps, seem to me to be the most important meta-information a picture can have. It is extremely helpful in organizing pictures, for example to cluster pictures that have been taken at the same location but at different times. Personally, I always need this data whenever I upload my pictures to Wikimedia Commons, as it asks me during the process about the geolocation of these pictures. Before, each time I had to look up the data individually on OpenStreetMap and fill in the information manually. Pretty fast, I got bored of this and I was looking for a way to write this information automatically into my pictures even before uploading.
One solution to this is a GPS-recorder built-in or attached to the camera. Unfortunately, very few cameras come with a GPS-recorder built-in and additional GPS-modules are a way too expensive for most hobby enthusiasts. Fortunately, there are software-solutions, that enable you to use just any other device which is able to capture GPS-tracks and then later merge this recorded geo-information with your pictures taken.
For sure, there are multiple ways to do this. In this blogpost, I will show you how you can do this with a smarthphone, OpenStreetMap and Free Software. All you need is:
- a smartphone running Android or a custom fork
- Osmand~
- a camera
- GPS correlate
Set up your infrastructure
Get Osmand
If you have a phone that is running Android or a more privacy and freedom friendly fork of Android get yourself Osmand, the “Global Mobile Map Viewing and Navigation for Online and Offline OpenStreetMaps”.
You can get it in the usual app-stores, but as it is Free Software, you can also get in on F-Droid, the Free Software app repository. For your privacy I recommend the latter and I wrote up a short manual about how to do it in a previous blogpost. If you choose this way, however, please consider donating to finance further development.
Sync your time
It is crucial that you have the time on your devices in sync. If not, there are possibilities to fix that afterwards, but you save yourself a lot of work if you make sure that your GPS-recorder (your smartphone in our case) and your camera are in time sync.
In action: record your track
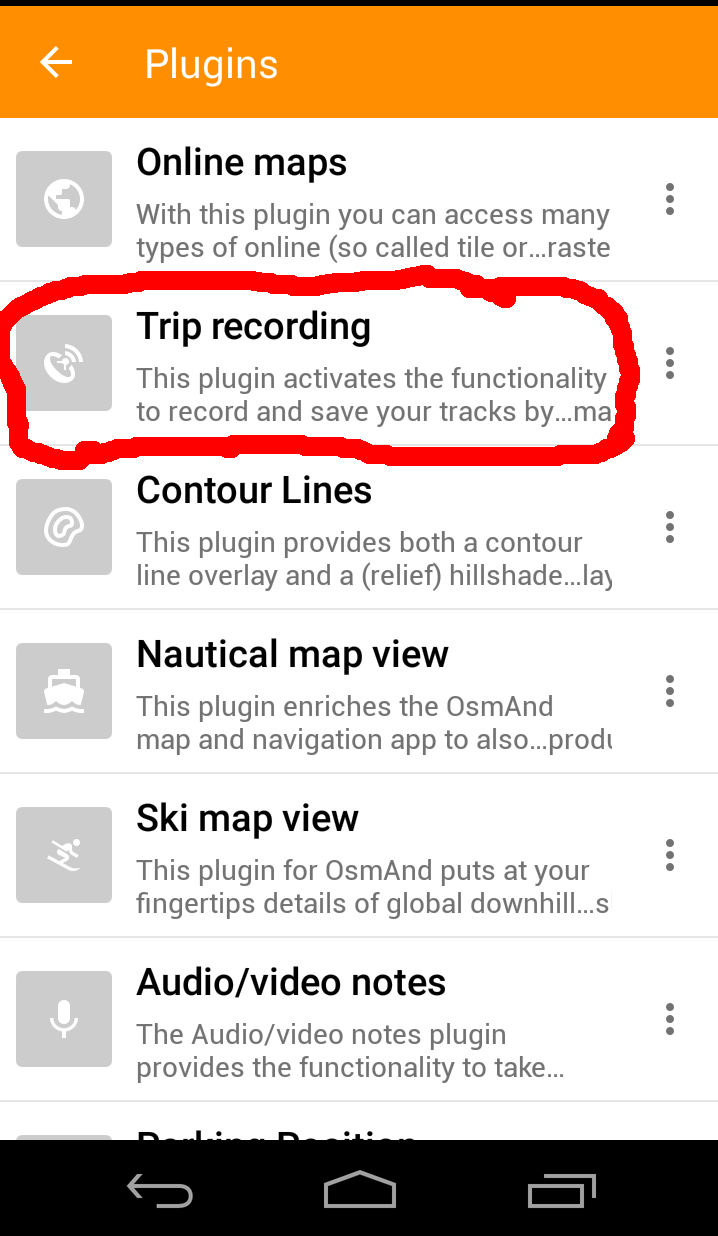
Once you have downloaded Osmand, there is no need to download additional plugins. However, you have to activate the Trip recording plugin first.
Here is how to do and use it:


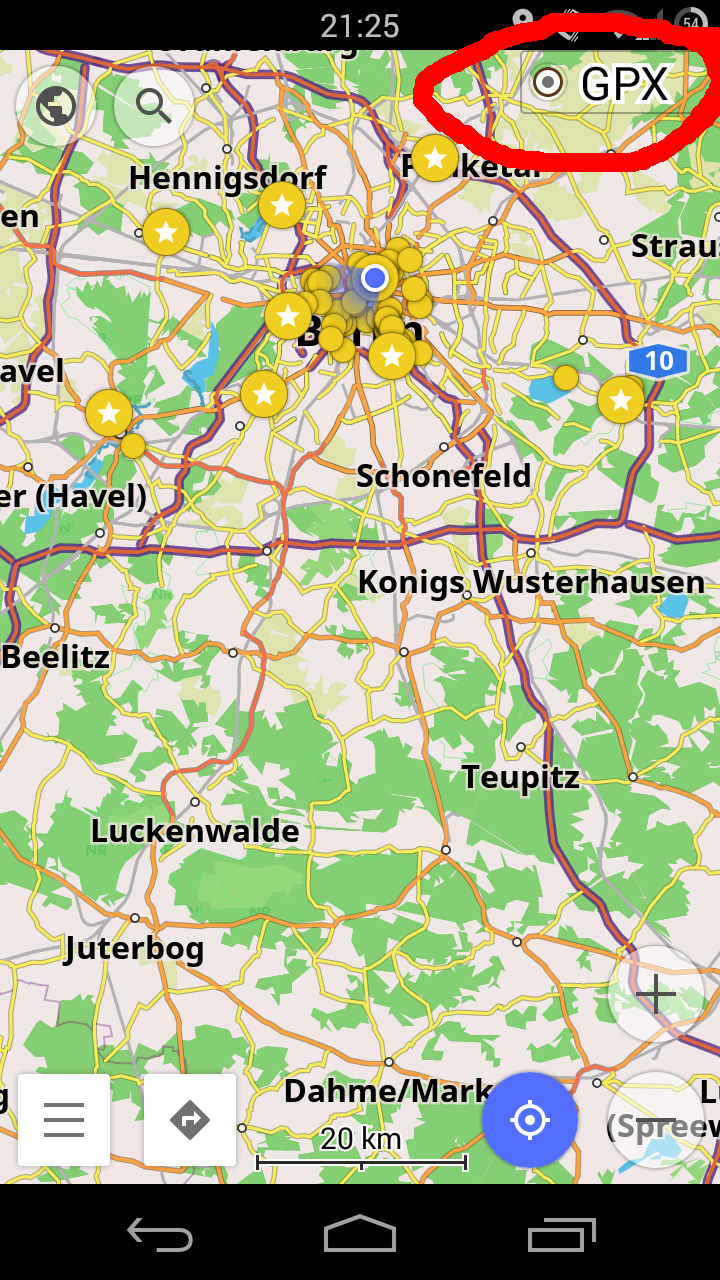

And by the way:


Afterwards: Geotag your pictures
Get GPS Correlate
There are many ways to get GPS Correlate. You can
- get it from Github
- via your terminal with $ apt-get install gpscorrelate
- or via the Synaptic package manager:

Use GPS Correlate
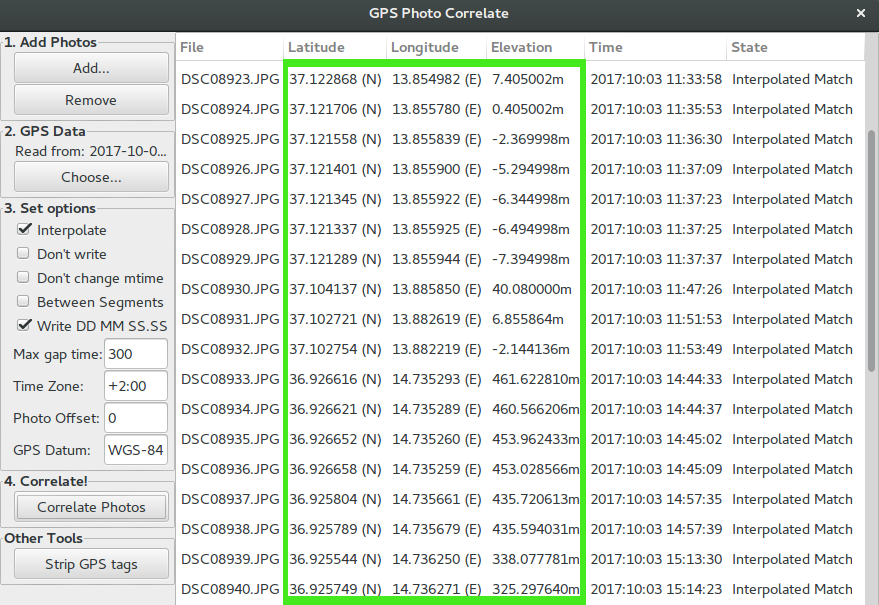
The interface is pretty simple:

- Press to “add photos” and choose the photos you like to geotag. It can be a single picture or multiple pictures (e.g. all pictures along one gpx-track).
- Choose your recorded gpx-track where is written “GPS Data”
- Keep the default ticked options to “Interpolate” and “Write DD MM SS.SS”
- Choose a maximum gap time for a picture to be matched. I choose 5 minutes (300 seconds) here.
- Put your time zone in UTC
- Go ahead, correlate photos
Now you should see the interpolated match of your pictures and your gpx-track and you are done:
Enjoy your batch processed pictures!
A big hug and thank you to all the people behind OpenStreetMap, behind Osmand, to Daniel Foote and Dan Fandrich for making this possible! Happy I love Free Software Day 2018!
—
Related articles: